 Luttie
Color grading tools
Creative and LUTs
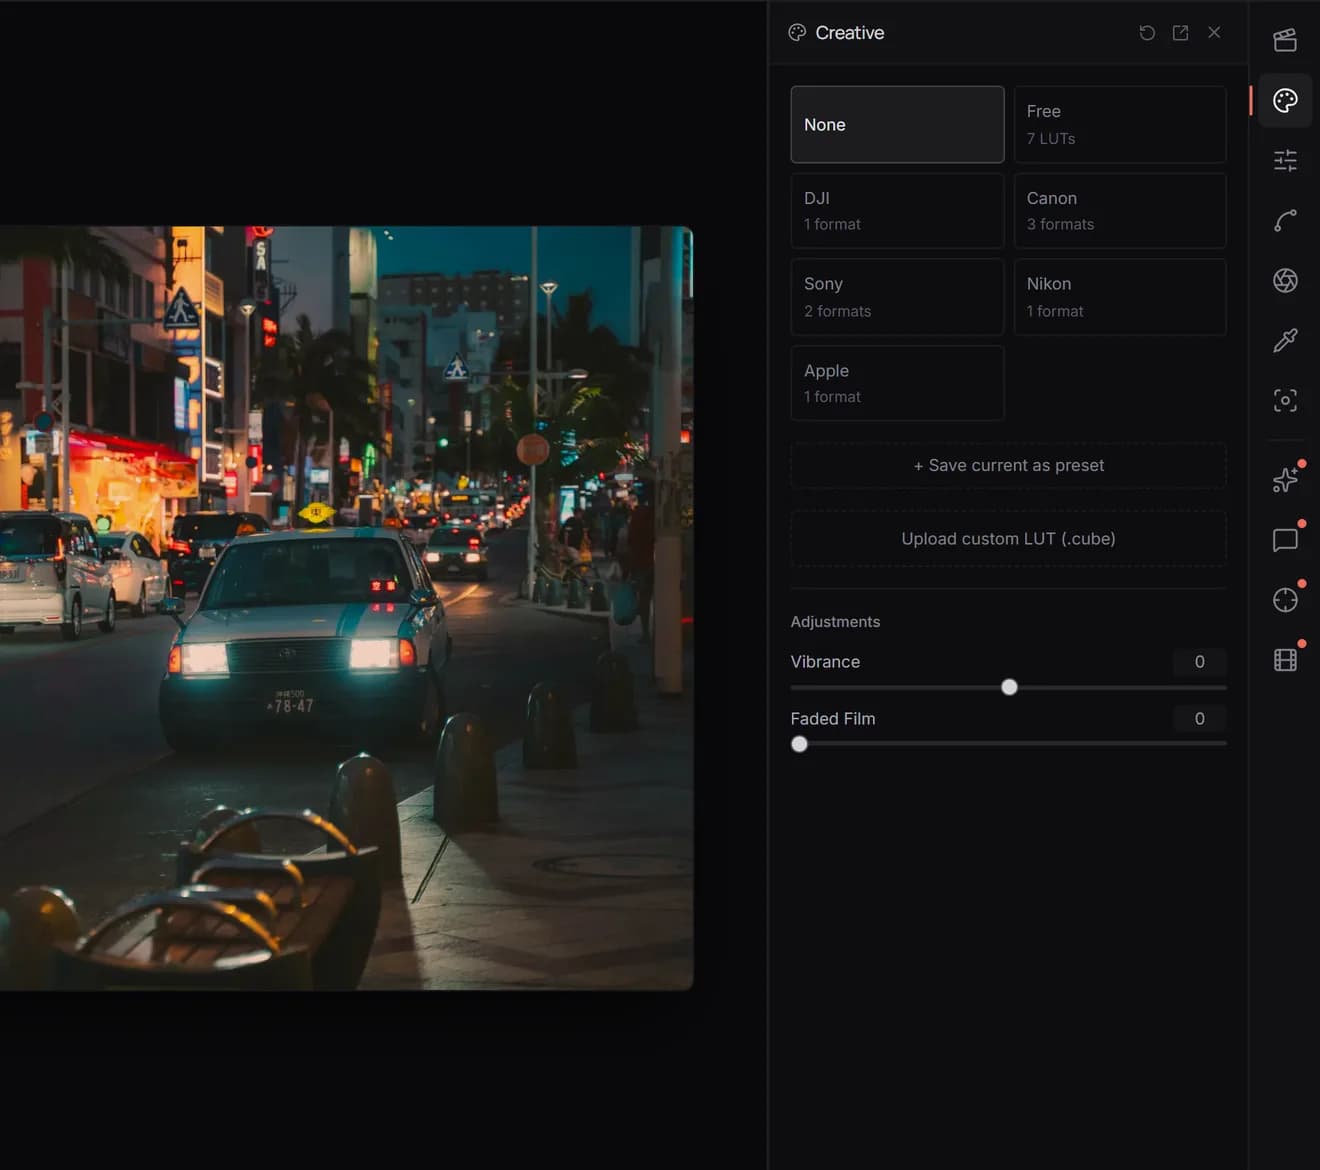
Apply a ready-made LUT, load your own .cube file, adjust vibrance and faded film, and save your grade as a preset.
The Creative panel is the fastest way to a finished look: pick a LUT and you're most of the way there.
What a LUT is
A LUT (look-up table) is a file that says, for every colour, which colour to turn it into. Applying one gives an image a complete look in a single step, and the same .cube file works in most editing apps.
Applying a LUT preset
Click a category to browse its LUTs, then click one to apply it. None removes it.
- Free: creative looks, open to everyone.
- Camera categories Pro: DJI (D-Log M), Canon (C-Log, C-Log 2, C-Log 3), Sony (S-Log2, S-Log3), Nikon (N-Log) and Apple (Apple Log). These convert log footage to normal-looking colour. See Log footage.
Loading your own LUT
Drop a .cube file onto the drop zone in the panel, or click it to choose one. It appears as Custom, and you can switch between it and the presets. Loading your own LUT is free.
A LUT applied here sits at one point in the grading chain. By default Basic Correction and Color Wheels come before it and Curves after it, so your corrections feed into the LUT. Change that in the node graph.
Adjustments
- Vibrance raises the intensity of muted colours more than already-strong ones, so it lifts an image without making skin look sunburnt.
- Faded Film lifts the blacks and pulls the whites down slightly, for a matte, faded-print look.
Saving a preset
Click + Save current as preset and give it a name. It saves your whole grade, every panel, and it appears under Your Presets in this panel for one-click reuse. Presets are stored in your browser; see Projects and presets.
Want more LUTs? Browse the free LUT library, or the Pro LUT packs.